tu787878 gửi vào
- 17388 lượt xem
Hú Hú, Chúng ta cùng tiếp tục với bài 6 trong tutorial của mình  . Hôm nay mình sẽ hướng dẫn cách bạn giao tiếp Raspberry và Arduino thông qua module NRF24L01 nhé.
CHUẨN BỊ
- 1. Raspberry Pi
- 2. Arduino UNO
- 3. NRF24L01 x 2
- 4. Dây cắm
TIẾN HÀNH
I. Lắp mạch
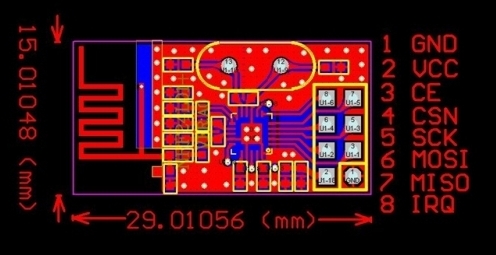
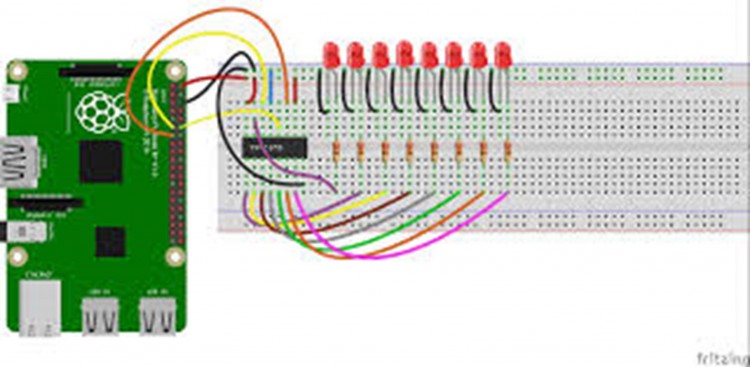
Raspberry Pi + NRF24L01

Arduino + NRF24L01
| NRF24 | Arduino |
| 1 | GND |
| 2 | 3.3V |
| 3 | D9 |
| 4 | D10 |
| 5 | D13 |
| 6 | D11 |
| 7 | D12 |
II. Lập trình
1. Raspberry Pi
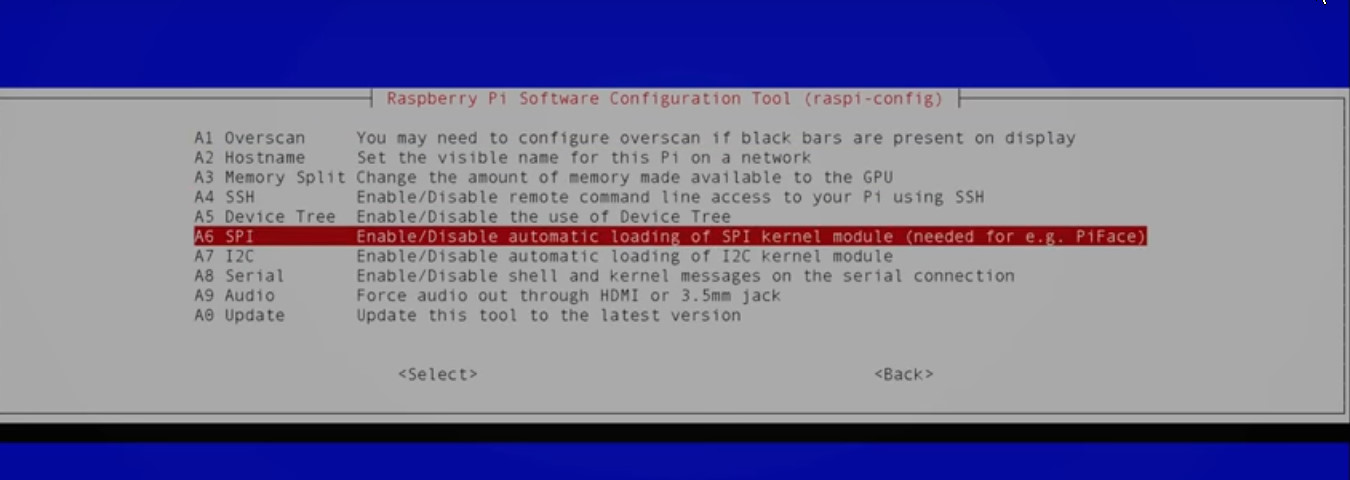
Mở cổng SPI
sudo raspi-config
Chọn Advanced Options
Chọn SPI => YES

Khởi tạo thư viện
sudo apt-get update
wget https://github.com/Gadgetoid/py-spidev/archive/master.zip
unzip master.zip
cd py-spidev-master
sudo python setup.py install
cd
mkdir NRF24L01
cd NRF24L01
git clone https://github.com/Blavery/lib_nrf24
cd lib_nrf24
cp lib_nrf24.py /home/pi/NRF24L01
Oke vậy là xong thư viện trên Raspberry. Các bạn lưu ý là phải đặt file nrf của mình trong thư mục NRF24L01, để cùng với thư viện vừa tạo nhé.

#!/usr/bin/python
# -*- coding: utf-8 -*-
#
# Example program to receive packets from the radio link
#
import RPi.GPIO as GPIO
GPIO.setmode(GPIO.BCM)
from lib_nrf24 import NRF24
import time
import spidev


pipes = [[0xE8, 0xE8, 0xF0, 0xF0, 0xE1], [0xF0, 0xF0, 0xF0, 0xF0, 0xE1]]

radio = NRF24(GPIO, spidev.SpiDev())
radio.begin(0, 17)

radio.setPayloadSize(32)
radio.setChannel(0x76)    #thiết lập kênh
radio.setDataRate(NRF24.BR_1MBPS)  #Tốc độ truyền
radio.setPALevel(NRF24.PA_MIN)   # Dung lượng truyền MIn

radio.setAutoAck(True)
radio.enableDynamicPayloads()
radio.enableAckPayload()

radio.openWritingPipe(pipes[0])     # Mở kênh phát
radio.openReadingPipe(1, pipes[1])  # Mở  kênh thu
radio.printDetails()   # In ra thông số Thu phát

radio.startListening()   #Bắt đầu thu
while True:
    tinnhan = list("Chao Arduino")
    while len(tinnhan) <32:
        tinnhan.append(0)
    radio.stopListening()    # Dừng thu để Phát
    radio.write(tinnhan)
    radio.startListening()   #Bắt đầu thu
    if radio.available(0):   # Nếu có Tín hiệu  tới
    receive = []
    radio.read(receive, radio.getDynamicPayloadSize())
    print ("Chao Tu: {}".format(receive))       # In thông số nhận
    string = ""
    for n in receive:
        if (n>=32 and n<=126):
        string+= chr(n)
    print("Tin nhan: {}".format(string))    # In tin nhận được từ arduino
2. Arduino
#include <SPI.h>
#include <RF24.h>

const uint64_t pipe = 0xE8E8F0F0E1LL; // địa chỉ thu phải giống với địa chỉ phát của Raspi
RF24 radio(9,10); //thay 10 thành 53 với mega

int val;
const char mess[] = "Chao Raspberry Pi"
void setup(){
  while (!Serial);
  Serial.begin(9600);
  //===========================Module NRF24============================
  radio.begin();
  radio.setPALevel(RF24_PA_MAX);      // Dung lượng tối đa
  radio.setChannel(0x76);
  radio.enableDynamicPayloads();
  radio.powerUp();
  radio.openWritingPipe(0xF0F0F0F0E1LL);      // Địa chỉ phát phải giống với địa chỉ thu của Raspberry
  radio.openReadingPipe(1, pipe);
  radio.startListening();      // Bắt đầu thu
}

void loop(){
  char receivedMessage[32] = {0};
  if (radio.available()){
    radio.read(receivedMessage, sizeof(receivedMessage));
    Serial.println(receivedMessage);
    radio.stopListening();
    radio.write(mess, sizeof(mess));
    radio.startListening();
    delay(1000);
}
3. Giải thích
Bản chất của module NRF24L01 thì chỉ hoạt động được một chiều ở một thời điểm, và có thể nhận thấy rằng thời gian phát rất ngắn nên ý tưởng để chúng ta có thể giao tiếp 2 chiều trên module này là sẽ cho nó luôn ở trạng thái thu, khi mình muốn phát thì chỉ cần dừng (radio.stopListening()) và write xong thì chỉ cần radio.startListening(). Như vậy là có thể giao tiếp giữa arduino và raspberry pi 2 chiều rồi.
KẾT LUẬN
Sau bài này mọi người có thể dễ dàng giao tiếp Raspberry Pi và Arduino qua sóng RF sử dụng module NRF24L01 được rôi. Và từ đó chúng ta hãy phát triển thêm, vận dụng những phần trước để dễ dàng điều khiển các thiết bị điện qua Internet trên một giao diện Web (Bài sau mình sẽ hướng dẫn kĩ hơn).
Chúc các bạn thành công haha


