minhsgc gửi vào
- 51346 lượt xem
Mình thấy nhiều bài đăng về điều khiển robot car, cũng muốn góp vui chút  . Chúc các bạn thành công, đây là dự án và code của mình.
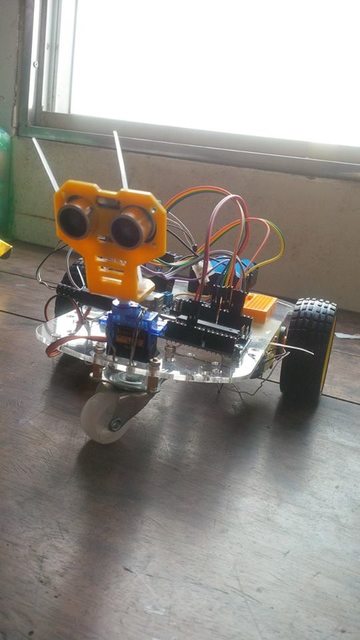
Những hình ảnh về dự án:
Bài viết truyền cảm hứng:
Cộng đồng Arduino Việt Nam
Ai cũng có thể đăng bài lên Arduino.vn. Tìm hiểu ngay!
minhsgc gửi vào
Mình thấy nhiều bài đăng về điều khiển robot car, cũng muốn góp vui chút . Chúc các bạn thành công, đây là dự án và code của mình.
minhsgc gửi vào
Bạn có thể làm robot tự hành tránh vật cản bằng cách này! Khám phá ngay.
Khoa Lê gửi vào
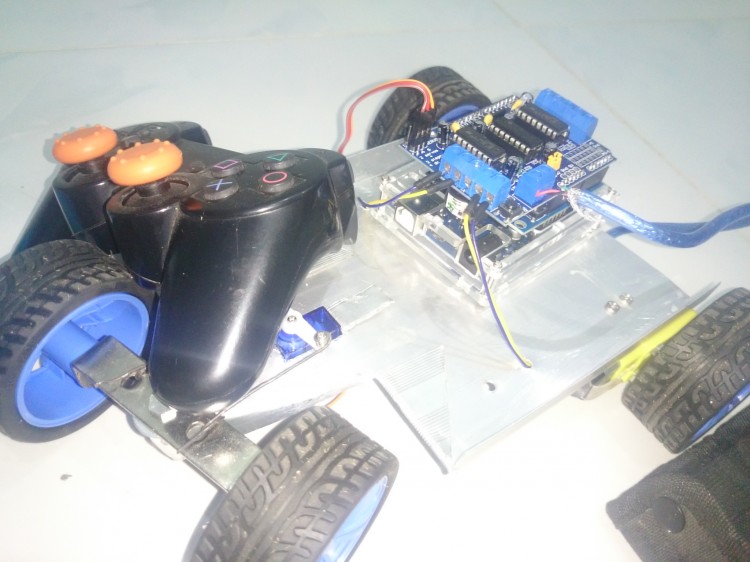
Vừa bắt đầu với arduino được hơn 1 tuần, có tham khảo qua các nguồn từ "trung ương đến địa phương", nắm được 1 số kiến thức cơ bản nên mình bắt đầu thực hiện 1 sản phẩm để đúc kết kinh nghiệm. Trong số đó thì xe điều khiển là dễ nhất. Kết hợp với cái tay game ps3 nằm lăn lóc ở góc nhà. Thế là có 1 chiếc xe điều khiển từ xa. Bắt đầu nhé.
Nguyễn Đức Hải gửi vào
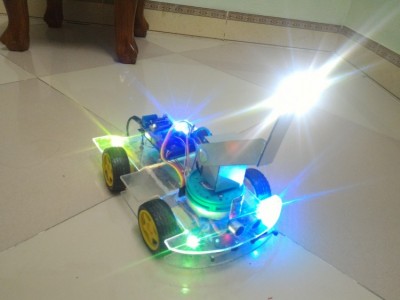
Mình rất thích điện tử nhưng không học về ngành điện tử. Rất may là có Adruino, rồi có cộng đồng Adruino Việt Nam, đặc biệt là sự nhiệt tình của tất cả các bạn trong cộng đồng, mình đã làm được 1 chiếc xe điều khiển từ xa. Cho con chơi là lí do phụ thôi, còn tìm hiểu, học tập là chính. Hôm nay chia sẻ cùng các bạn, cùng gửi lời cảm ơn đến tất cả các bạn trong cộng đồng. Có bạn thì giúp đỡ trực tiếp, có bạn thì viết bài, rồi có bạn thì bình luận, nêu câu hỏi. Tất cả đều có giá trị đối với mình.
Ngại viết bài nên mình đăng dưới dạng ảnh.
minhsgc gửi vào
Bạn có thể làm robot tự hành tránh vật cản bằng cách này! Khám phá ngay.


Hãy trở thành thành viên của Cộng đồng Arudino Việt Nam để mở khóa chức năng này.
Linh kiện gồm có
2. Nối mạch
Trong bộ cảm biến hồng ngoại có 4 chân dò đèn led nhung các chân nó đều giống nhau cách nối nó với cảm biến hồng ngoại chính như sau:
Cách nối cảm biến chính với Arduino như sau:
Nó còn các chân VCC và GND nữa nhưng mình khỏi nói nha!
3. Lập trình
#define inA1 6 //Định nghĩa chân in1 của động cơ A
#define inA2 7 //Định nghĩa chân in2 của động cơ A
#define inB1 8 //Định nghĩa chân in1 của động cơ B
#define inB2 9 //Định nghĩa chân in2 của động cơ B
#define linesens1 10 //Định nghĩa chân cảm biến line 1
#define linesens2 11 //Định nghĩa chân cảm biến line 2
#define linesens3 12 //Định nghĩa chân cảm biến line 3
#define linesens4 13 //Định nghĩa chân cảm biến line 4
void setup() {
  Serial.begin(9600);
  pinMode(inA1, OUTPUT);//Set chân in1 của dc A là output
  pinMode(inA2, OUTPUT);//Set chân in2 của dc A là output
  pinMode(inB1, OUTPUT);//Set chân in1 của dc B là output
  pinMode(inB2, OUTPUT);//Set chân in2 của dc B là output
  pinMode(linesens1, INPUT);//Set chân cảm biến 1 là input
  pinMode(linesens2, INPUT);//Set chân cảm biến 2 là input
  pinMode(linesens3, INPUT);//Set chân cảm biến 3 là input
  pinMode(linesens4, INPUT);//Set chân cảm biến 4 là input


}

void loop() {
    darkLineFollower (inA1, inA2, inB1, inB2, linesens1, linesens2, linesens3, linesens4);
    //delayMicroseconds(1);
}

void darkLineFollower (byte inR1, byte inR2, byte inL1, byte inL2, byte sen1, byte sen2, byte sen3, byte sen4)
{
  //Hàm điều khiển robot bám line màu tối
  //inR1, inR2 và inL1, inL2 là các chân tín hiệu lần lượt điều khiển động cơ di chuyển bên phải và trái
  //sen1 đến sen4 là chân nhận tín hiệu từ cảm biến hồng ngoại
  //Bây giờ thì lập trình thôi
  switch (deviationDarkLine4Sensor (sen1, sen2, sen3, sen4))
  {
    case -1:
      robotMover( inR1, inR2, inL1, inL2, 6);// rẽ phải
      break;
    case -2:
      robotMover( inR1, inR2, inL1, inL2, 6);
      break;
    case 1:
      robotMover( inR1, inR2, inL1, inL2, 5);// rẽ trái
      break;
    case 2:
      robotMover( inR1, inR2, inL1, inL2, 5);
      break;
    case 0:
      robotMover( inR1, inR2, inL1, inL2, 1);// tiến thẳng
      break;
    case 3:
      robotMover( inR1, inR2, inL1, inL2, 2);// lệch vạch thì lùi
      break;

  }

}
void robotMover (byte inR1, byte inR2, byte inL1, byte inL2, byte action)
{
  /*
  inR1 inR2 là 2 chân tín hiệu động cơ bên phải
  inL1 inL2 là 2 chân tín hiệu động cơ bên trái
  action= 0 đứng yên
  action =1 đi thẳng
  action =2 lùi lại
  action =3 quay trái
  action =4 quay phải
  action =5 rẽ trái
  action =6 rẽ phải

  */
  switch (action)
  {
    case 0:// không di chuyển
      motorControlNoSpeed(inR1, inR2, 0);
      motorControlNoSpeed(inL1, inL2, 0);
      break;
    case 1://đi thẳng
      motorControlNoSpeed(inR1, inR2, 1);
      motorControlNoSpeed(inL1, inL2, 1);
      break;
    case 2:// lùi lại
      motorControlNoSpeed(inR1, inR2, 2);
      motorControlNoSpeed(inL1, inL2, 2);
      break;
    case 3:// quay trái
      motorControlNoSpeed(inR1, inR2, 2);
      motorControlNoSpeed(inL1, inL2, 1);
      break;
    case 4:// quay phải
      motorControlNoSpeed(inR1, inR2, 1);
      motorControlNoSpeed(inL1, inL2, 2);
      break;
    case 5:// rẽ trái
      motorControlNoSpeed(inR1, inR2, 1);
      motorControlNoSpeed(inL1, inL2, 0);
      break;
    case 6:// rẽ phải
      motorControlNoSpeed(inR1, inR2, 0);
      motorControlNoSpeed(inL1, inL2, 1);
      break;
    default:
      action = 0;

  }
}


void motorControlNoSpeed (byte in1, byte in2, byte direct)
{
  // in1 and in2 are 2 signal pins to control the motor
  // en is the enable pin
  // the defauspeed is the highest
  // direct includes:
  //    0:Stop
  //    1:Move on 1 direct
  //    2:Move on another direct
  switch (direct)
  {
    case 0:// Dừng không quay
      digitalWrite(in1, LOW);
      digitalWrite(in2, LOW);
      break;
    case 1:// Quay chiều thứ 1
      digitalWrite(in1, HIGH);
      digitalWrite(in2, LOW);
      break;
    case 2:// Quay chiều thứ 2
      digitalWrite(in1, LOW);
      digitalWrite(in2, HIGH);
      break;
      //default:
  }
}
boolean IFSensor (byte PinNumb)
{
//0 sáng
//1 tối
  return(digitalRead (PinNumb));
}

int deviationDarkLine4Sensor (int PinNumb1, int PinNumb2, int PinNumb3, int PinNumb4)
{
  int left = 0; //biến kiểm tra lệch trái
  int right = 0; // biến kiểm tra lệch phải
  left = IFSensor (PinNumb1)+IFSensor (PinNumb2); //kiểm tra mấy cảm biến trái ở trong màu đen
  right= IFSensor (PinNumb3)+IFSensor (PinNumb4); //kiểm tra mấy cảm biến phải ở trong màu đen
  Serial.print("left=");
  Serial.println(left);
  Serial.print("right=");
  Serial.println(right);
  if ((left!=0) || (right!=0))return left - right;
  else return 3;
  /*
  Kết quả trả về là 0 là không lệch
  Âm là lệch trái
  Dương là lệch phải
  */

}
Hay mình ghi bằng codebender để các bạn dễ biên dịch: