monsieurvechai gửi vào
- 105500 lượt xem
Đây là phần 3 của tutorial "Đi học dzìa". Nếu bạn đã chán youtube hoặc bạn dù không ở nhà nhưng vẫn muốn làm điệp viên "Không Không Thấy" kiểm soát xem ai đã về đến nhà và nhận thông báo qua email.
Nguyên lý
Chúng ta vẫn dùng cảm biến PIR như phần 2: http://arduino.vn/bai-viet/985-di-hoc-dzia-phan-2-su-dung-pir-de-kiem-tra-nguoi-ve-nha nhưng thay vì chơi nhạc youtube thì Raspberry sẽ quay lại hình ảnh trong 20 giây và gửi qua email.
Chuẩn bị
- 1 Raspberry Pi hay Pizero.
- 1 PIR sensor.
- 1 module camera
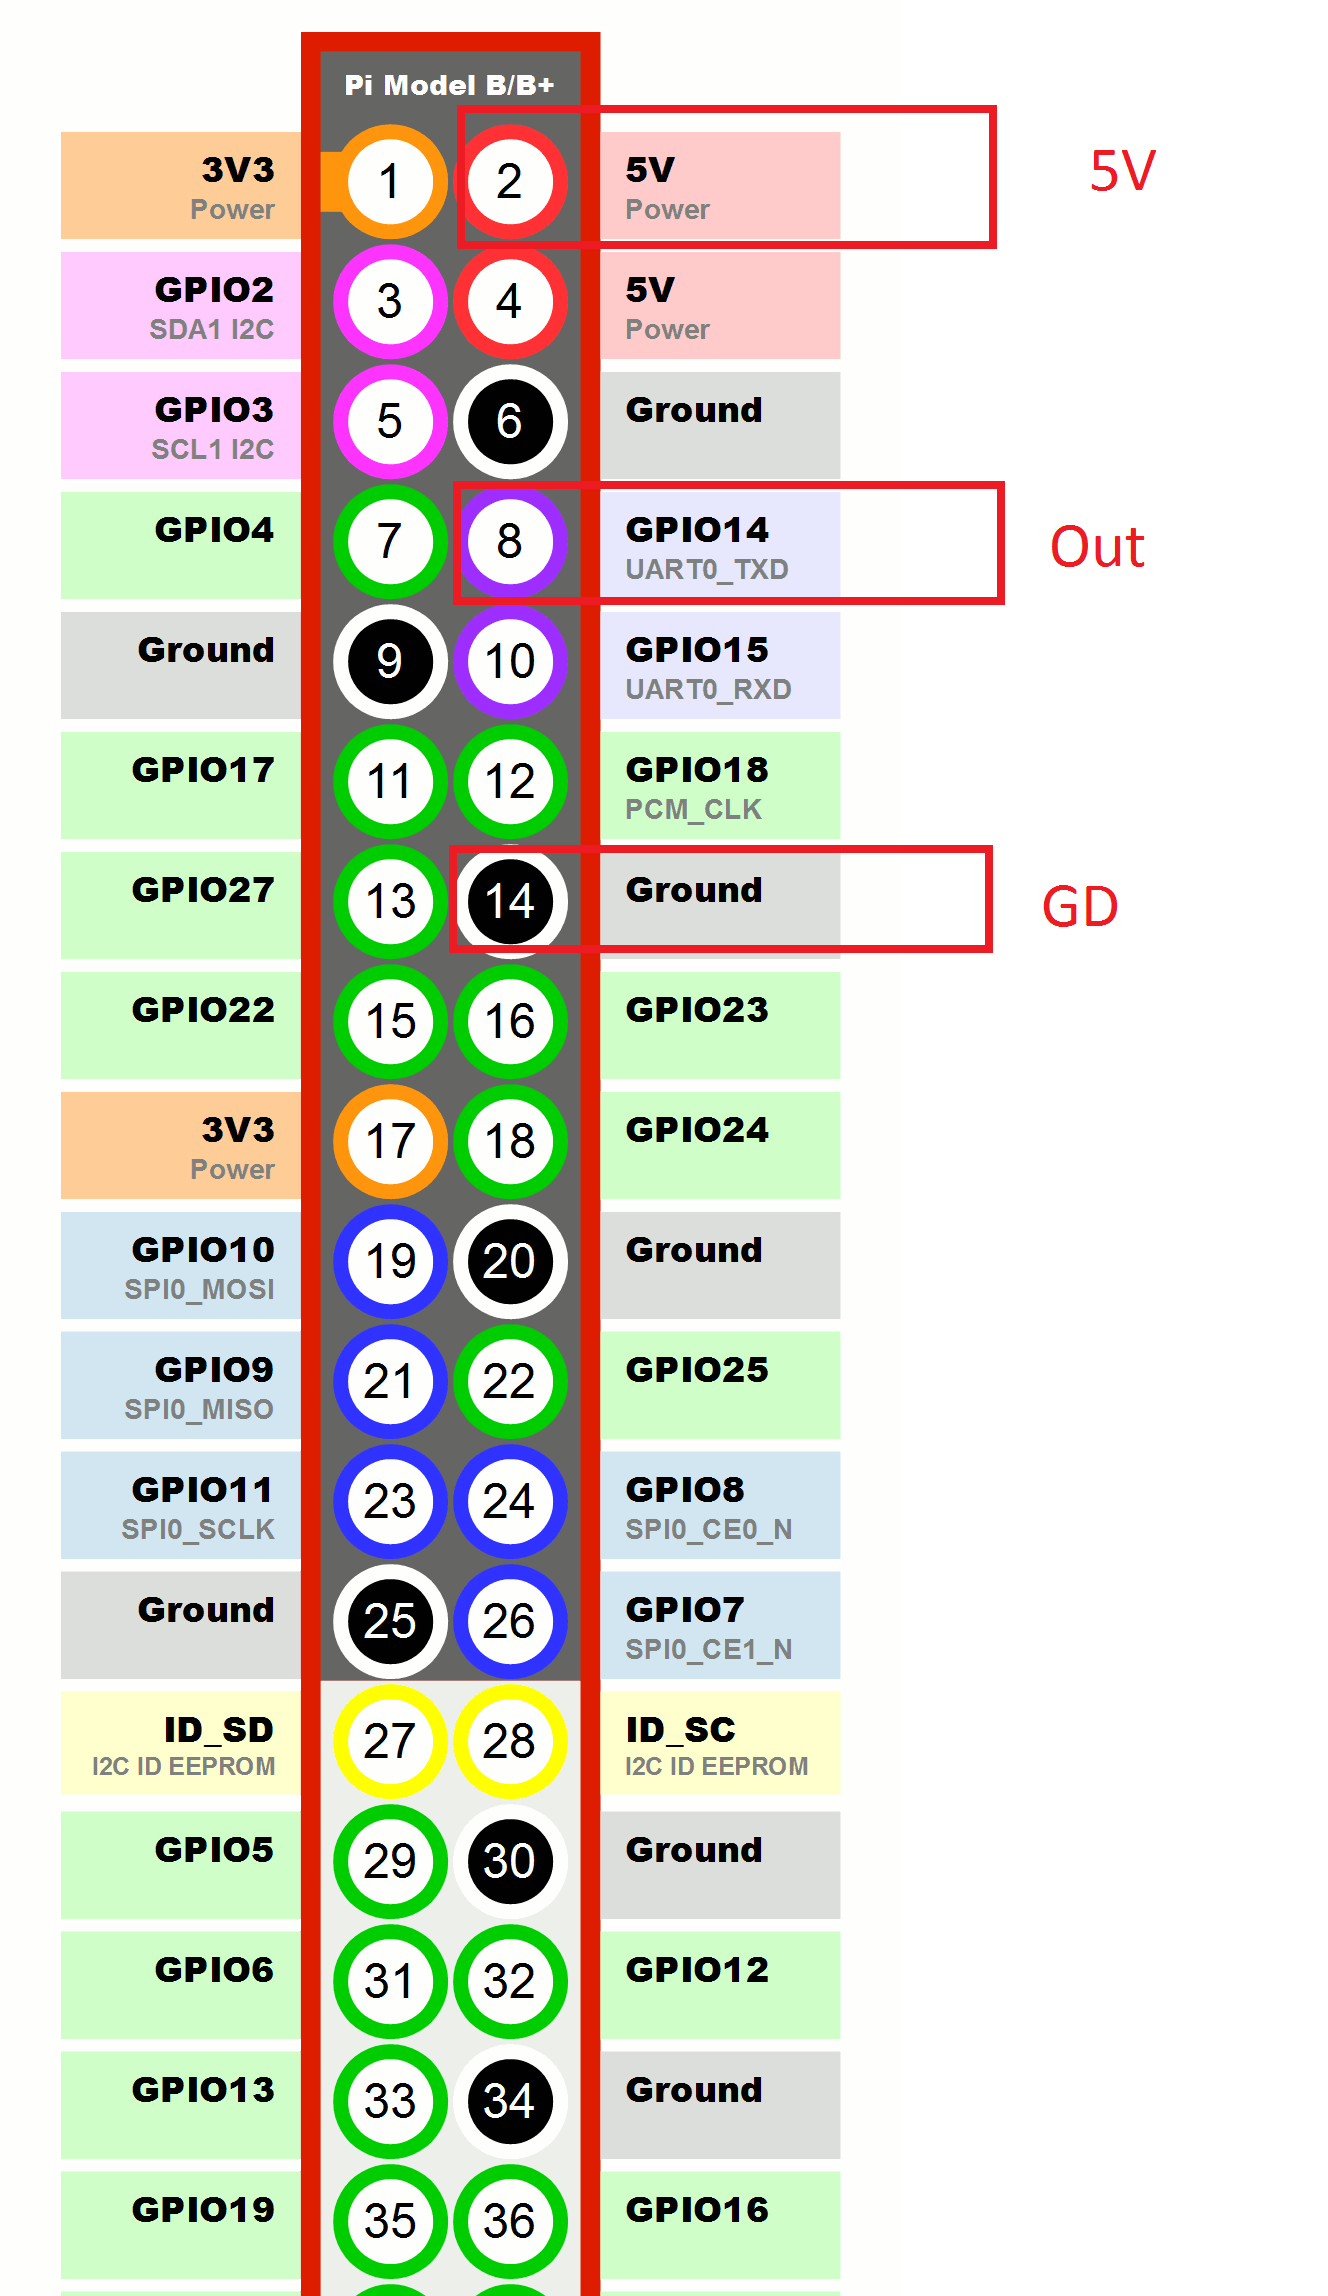
Sơ đồ nối như sau
| Pi | PIR |
| 5V | 5V |
| GD | GD |
| P8 | Out |
Trên Raspberry Pi:
Chép đoạn code sau và lưu lại với tên di_hoc_ve_2.py
#!/usr/bin/python
#By MonsieurVechai
import RPi.GPIO as GPIO
from picamera import PiCamera
import time, os, email
from datetime import datetime
import smtplib
from email import Encoders
from email.MIMEMultipart import MIMEMultipart
from email.MIMEBase import MIMEBase
from email.MIMEText import MIMEText


'''
The PIR sensor is attached to a GPIO pin on the Pi
This Python reads digital signal on Pi pin.
If the pin registers "High", the Pi Camera records for several seconds
The video is then sent to my gmail account
'''


def send_mail(file):
    UserName = "Something@gmail.com"
    Password = "Something"
    Recipient = "Something@gmail.com"

    msg = MIMEMultipart()
    msg['From'] = UserName
    msg['To'] = Recipient
    msg['Subject'] = "New detection on " + datetime.now().strftime("%Y_%m_%d_%H_%M_%S.h264")
    text = "Master, it seems that somebody entered the house just now."
    msg.attach( MIMEText(text) )

    part = MIMEBase("application", "octet-stream")
    fo=open(file,"rb")
    part.set_payload(fo.read() )
    Encoders.encode_base64(part)
    part.add_header('Content-Disposition', 'attachment; filename="%s"'  %os.path.basename(file))
    msg.attach(part)

    s = smtplib.SMTP('smtp.gmail.com:587')
    s.ehlo()
    s.starttls()
    s.login(UserName, Password)
    s.sendmail(UserName, Recipient, msg.as_string())
    s.close()


def main():
    # Use BCM GPIO references instead of physical pin numbers
    GPIO.setmode(GPIO.BCM)

    # Define GPIO to use on Pi
    GPIO_PIR = 14
    # Set pin as input
    GPIO.setup(GPIO_PIR,GPIO.IN)

    print "PIR Module is initialized (press CTRL-C to exit)"

    camera = PiCamera()
    print "Pi Camera is initialized (press CTRL-C to exit)"

    try:
        # Loop until PIR output is 0
        while GPIO.input(GPIO_PIR)==1:
            print "Waiting for PIR to settle ..."

        print "  PIR is settled. Ready to detect new motion"
        Current_State  = 0
        Previous_State = 0

        # Loop until users quits with CTRL-C
        while True :
            # Read PIR state
            Current_State = GPIO.input(GPIO_PIR)
            if Current_State==1 and Previous_State==0:
                print "Motion detected! Start recording movie."
                filename = datetime.now().strftime("%Y_%m_%d_%H_%M_%S.h264")
                camera.start_recording(filename)
                time.sleep(20)
                Previous_State=1
            elif Current_State==0 and Previous_State==1:
                camera.stop_recording()
                path_of_movie = os.path.abspath(filename)

                #Sending email
                try:
                    send_mail(path_of_movie)
                    print "Sending email done. Ready to detect new motion"
                except IOError:
                    print "Something wrong. Mail not sent"


            #Debounce: PIR was previously active but now there no motion
                Previous_State=0
                time.sleep(0.01)

    except KeyboardInterrupt:
        print "Quit program"
        GPIO.cleanup()


if __name__ == "__main__":
    main()
Thay đổi địa chỉ email bằng địa chỉ email và password của bạn (phải là Gmail (cho dễ) nhé). Nhớ là phải để trong ngoặc kép nha:
sudo python di_hoc_ve_2.py
Lưu ý
- Code này chỉ hoạt động được trên tài khoản gmail thôi nha! Và bạn phải vào https://www.google.com/settings/security/lesssecureapps, chọn "Turn on" cho phần "Access for less secure apps" thì mới gửi mail bằng Python được.
- Bạn nên tạo 1 tài khoản gmail email riêng vì bất cứ ai mở file python đều có thể đọc được mật khẩu hộp thư cá nhân của bạn.
- Lần đầu làm bạn nên comment # cho đoạn send_mail(path_of_movie) để tránh tài khoảng bị khóa hộp thư vì bị hiểu nhầm là spam.
- Bạn có thể chỉnh sửa thời gian quay ở đây, nhưng mà quay ít ít thoai, nặng quá là không gửi qua email được đâu (max 20MB):
camera.start_recording(filename)
time.sleep(20)
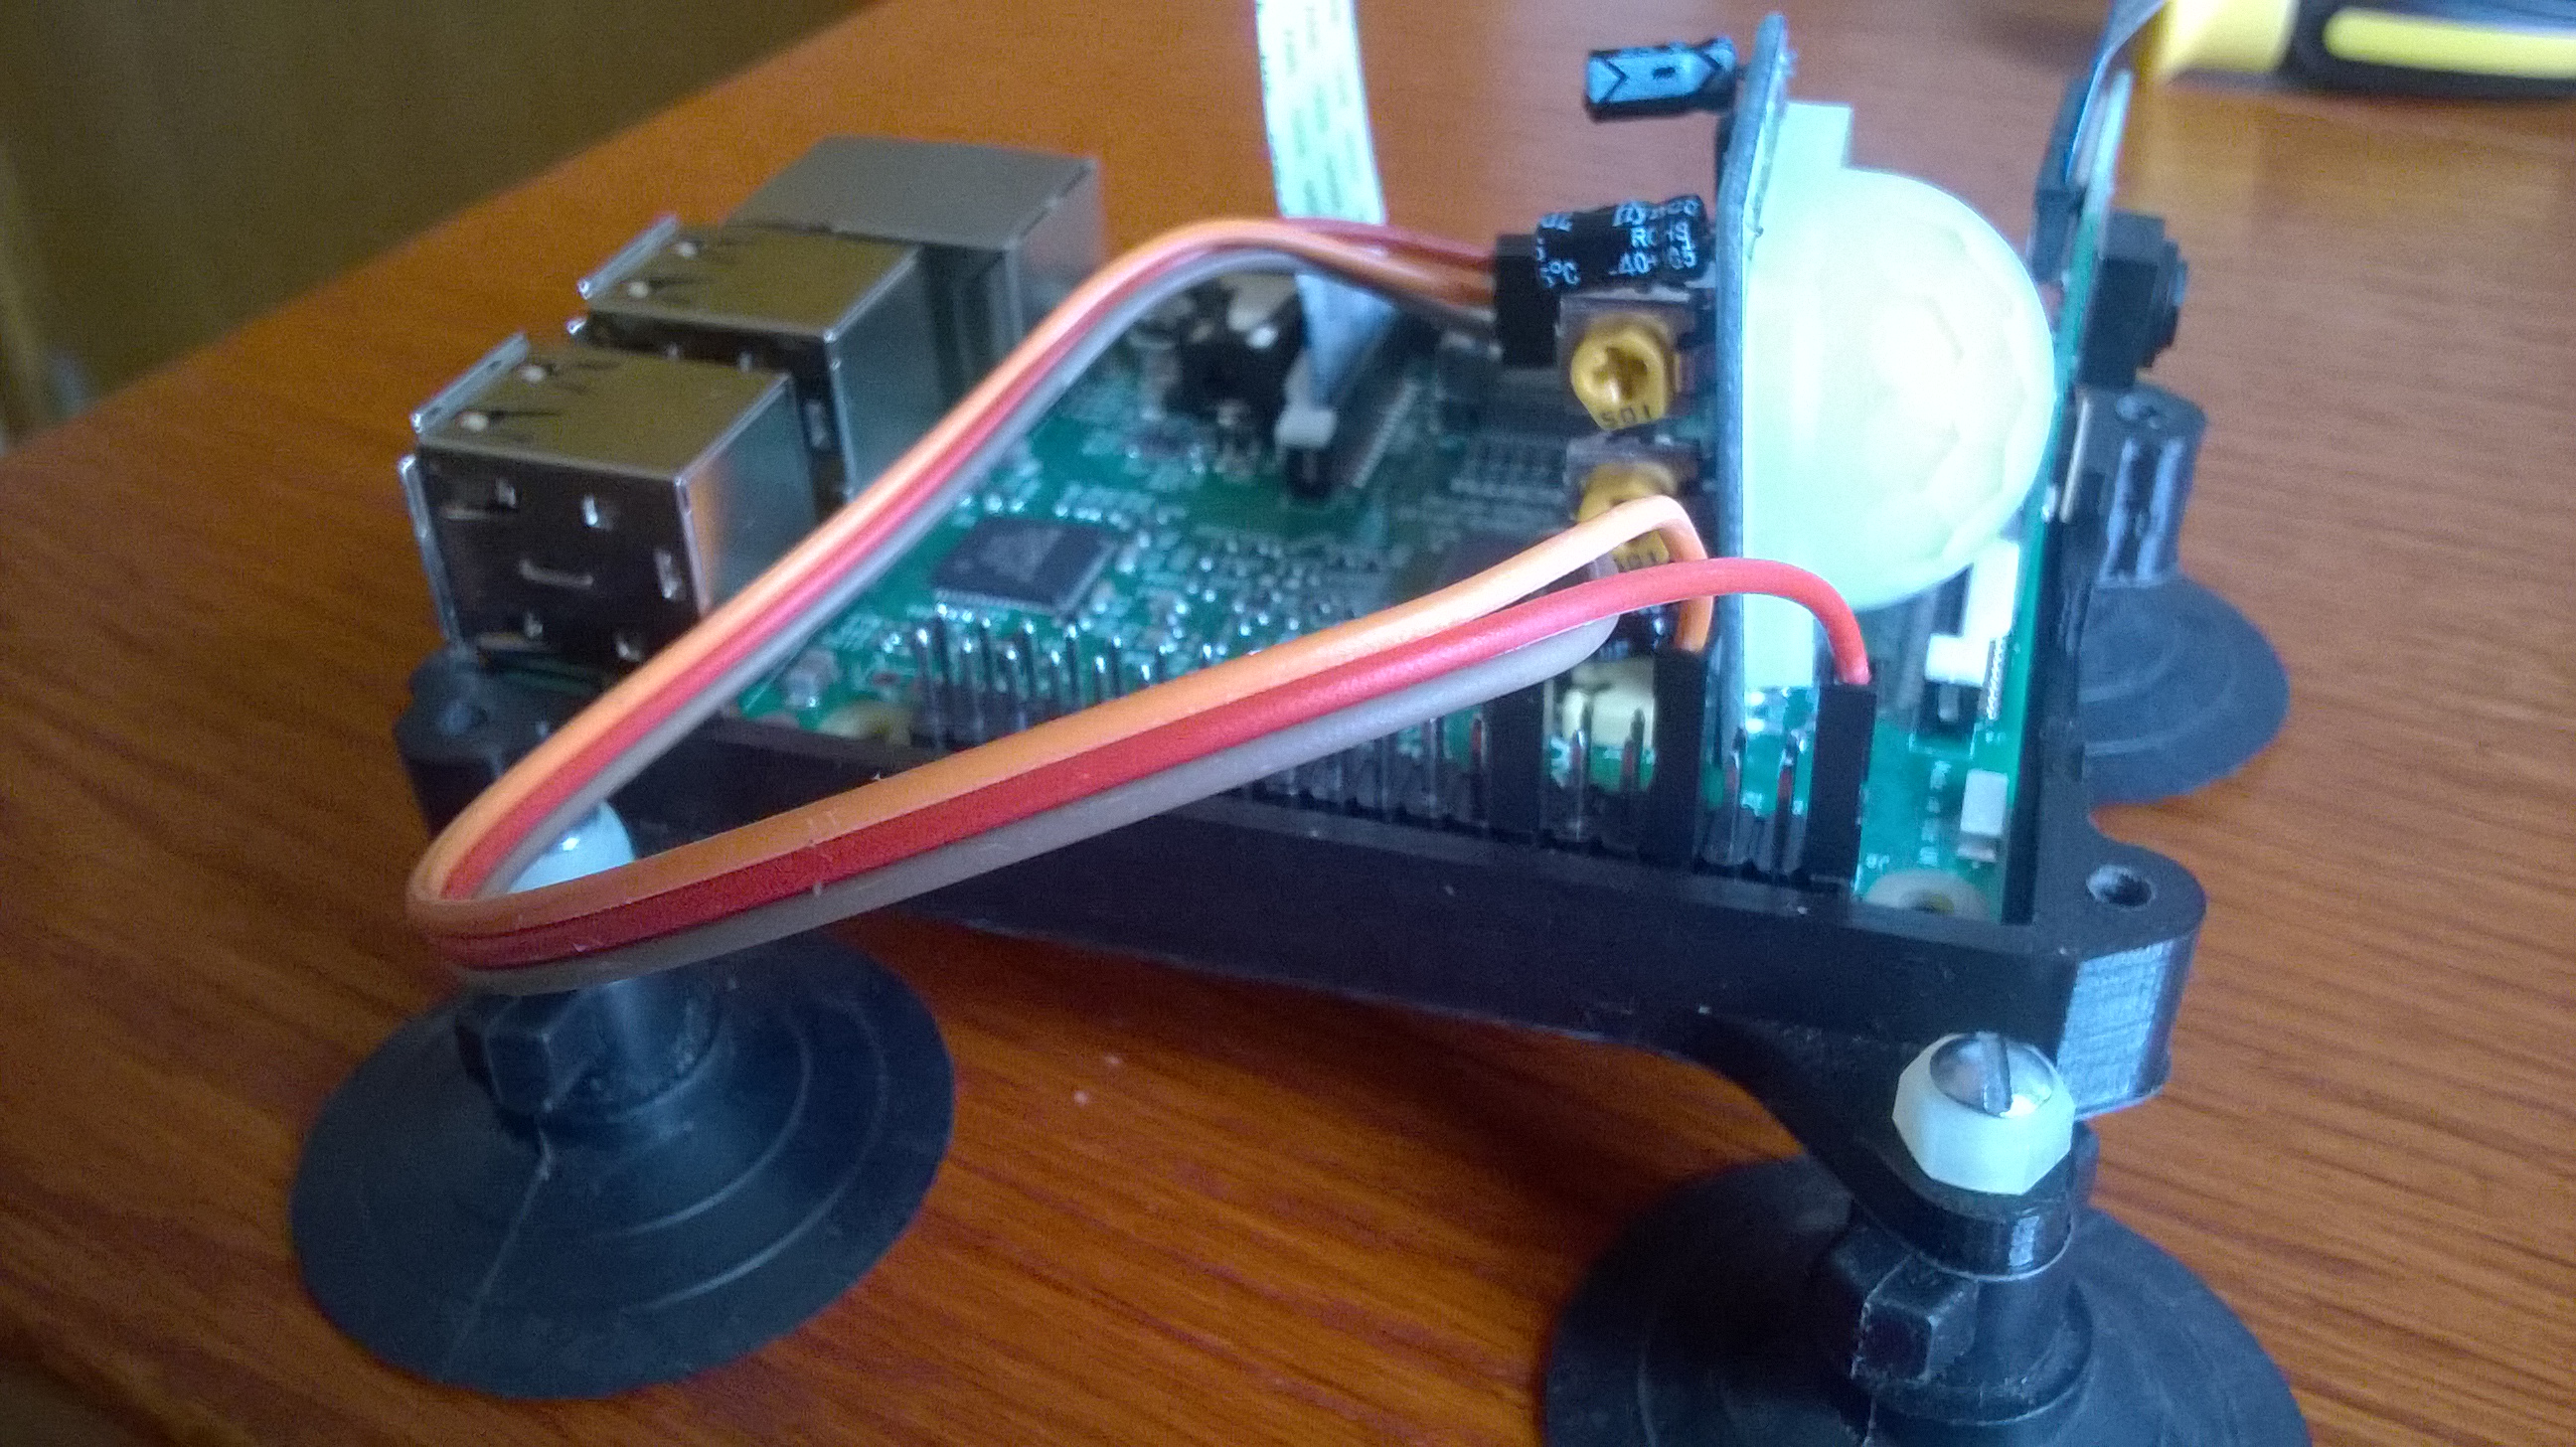
- Case tui download trên trang thingiverse: http://www.thingiverse.com/thing:922740 và in 3D ra.
Gợi ý nâng cao
- Kết hợp với arp-scan kỳ trước, gửi email vào hộp thư của bạn khi có MAC lạ kết nối vào mạng nhà bạn
- Điều khiển camera bằng cách nối với wifi: Thay vì dùng nút bấm vật lý thông thường hay SSH, bạn có thể dùng on/off wifi của smartphone/laptop để ra lệnh cho Raspberry Pi chụp hình quay phim.
Đây là bài tutorial cuối của chuỗi bài "Đi học dzìa". Bài tới tui sẽ chuyển sang các ứng dụng camera với chuỗi bài "Đi học thoai". 


