monsieurvechai gửi vào
- 78692 lượt xem
3 bài trước các bạn đã làm quen nhấp nháy với module neopixel WS2812 roài hen. Nhưng mà mỗi 1 bóng hoài cũng cũng chán nên lần này chúng ta chơi tới bến ứng dụng 24 bóng luôn nha!
Nguyên lý
- Để làm đồng hồ thông thường với Arduino thì ta cần phải có module thời gian thực (RTC). Tuy nhiên, ta có thể sử dụng 1 library khá hữu dụng tên là Time.h từ đây. Library này sử dụng hàm millis() để tính thời gian.
- Ta sẽ dùng module Neopixel Ring gồm 24 module WS2812 nối lại với nhau và sử dụng thuật toán modulo (%) để tính vị trí của các kim giây, phút, giờ và ra lệnh cho module qua cổng digital.
Phần cứng
- 1 module Neopixel Ring 24 như hình dưới: (các bạn tìm trên mạng hoặc đặc mua ở nước ngoài nhé, ở Việt Nam hơi khó kiếm
 )
)

- Các bạn nối với Arduino như sau:
| WS2812 | Arduino |
| 5V | 5V |
| GD | GD |
| DIN | A0 |
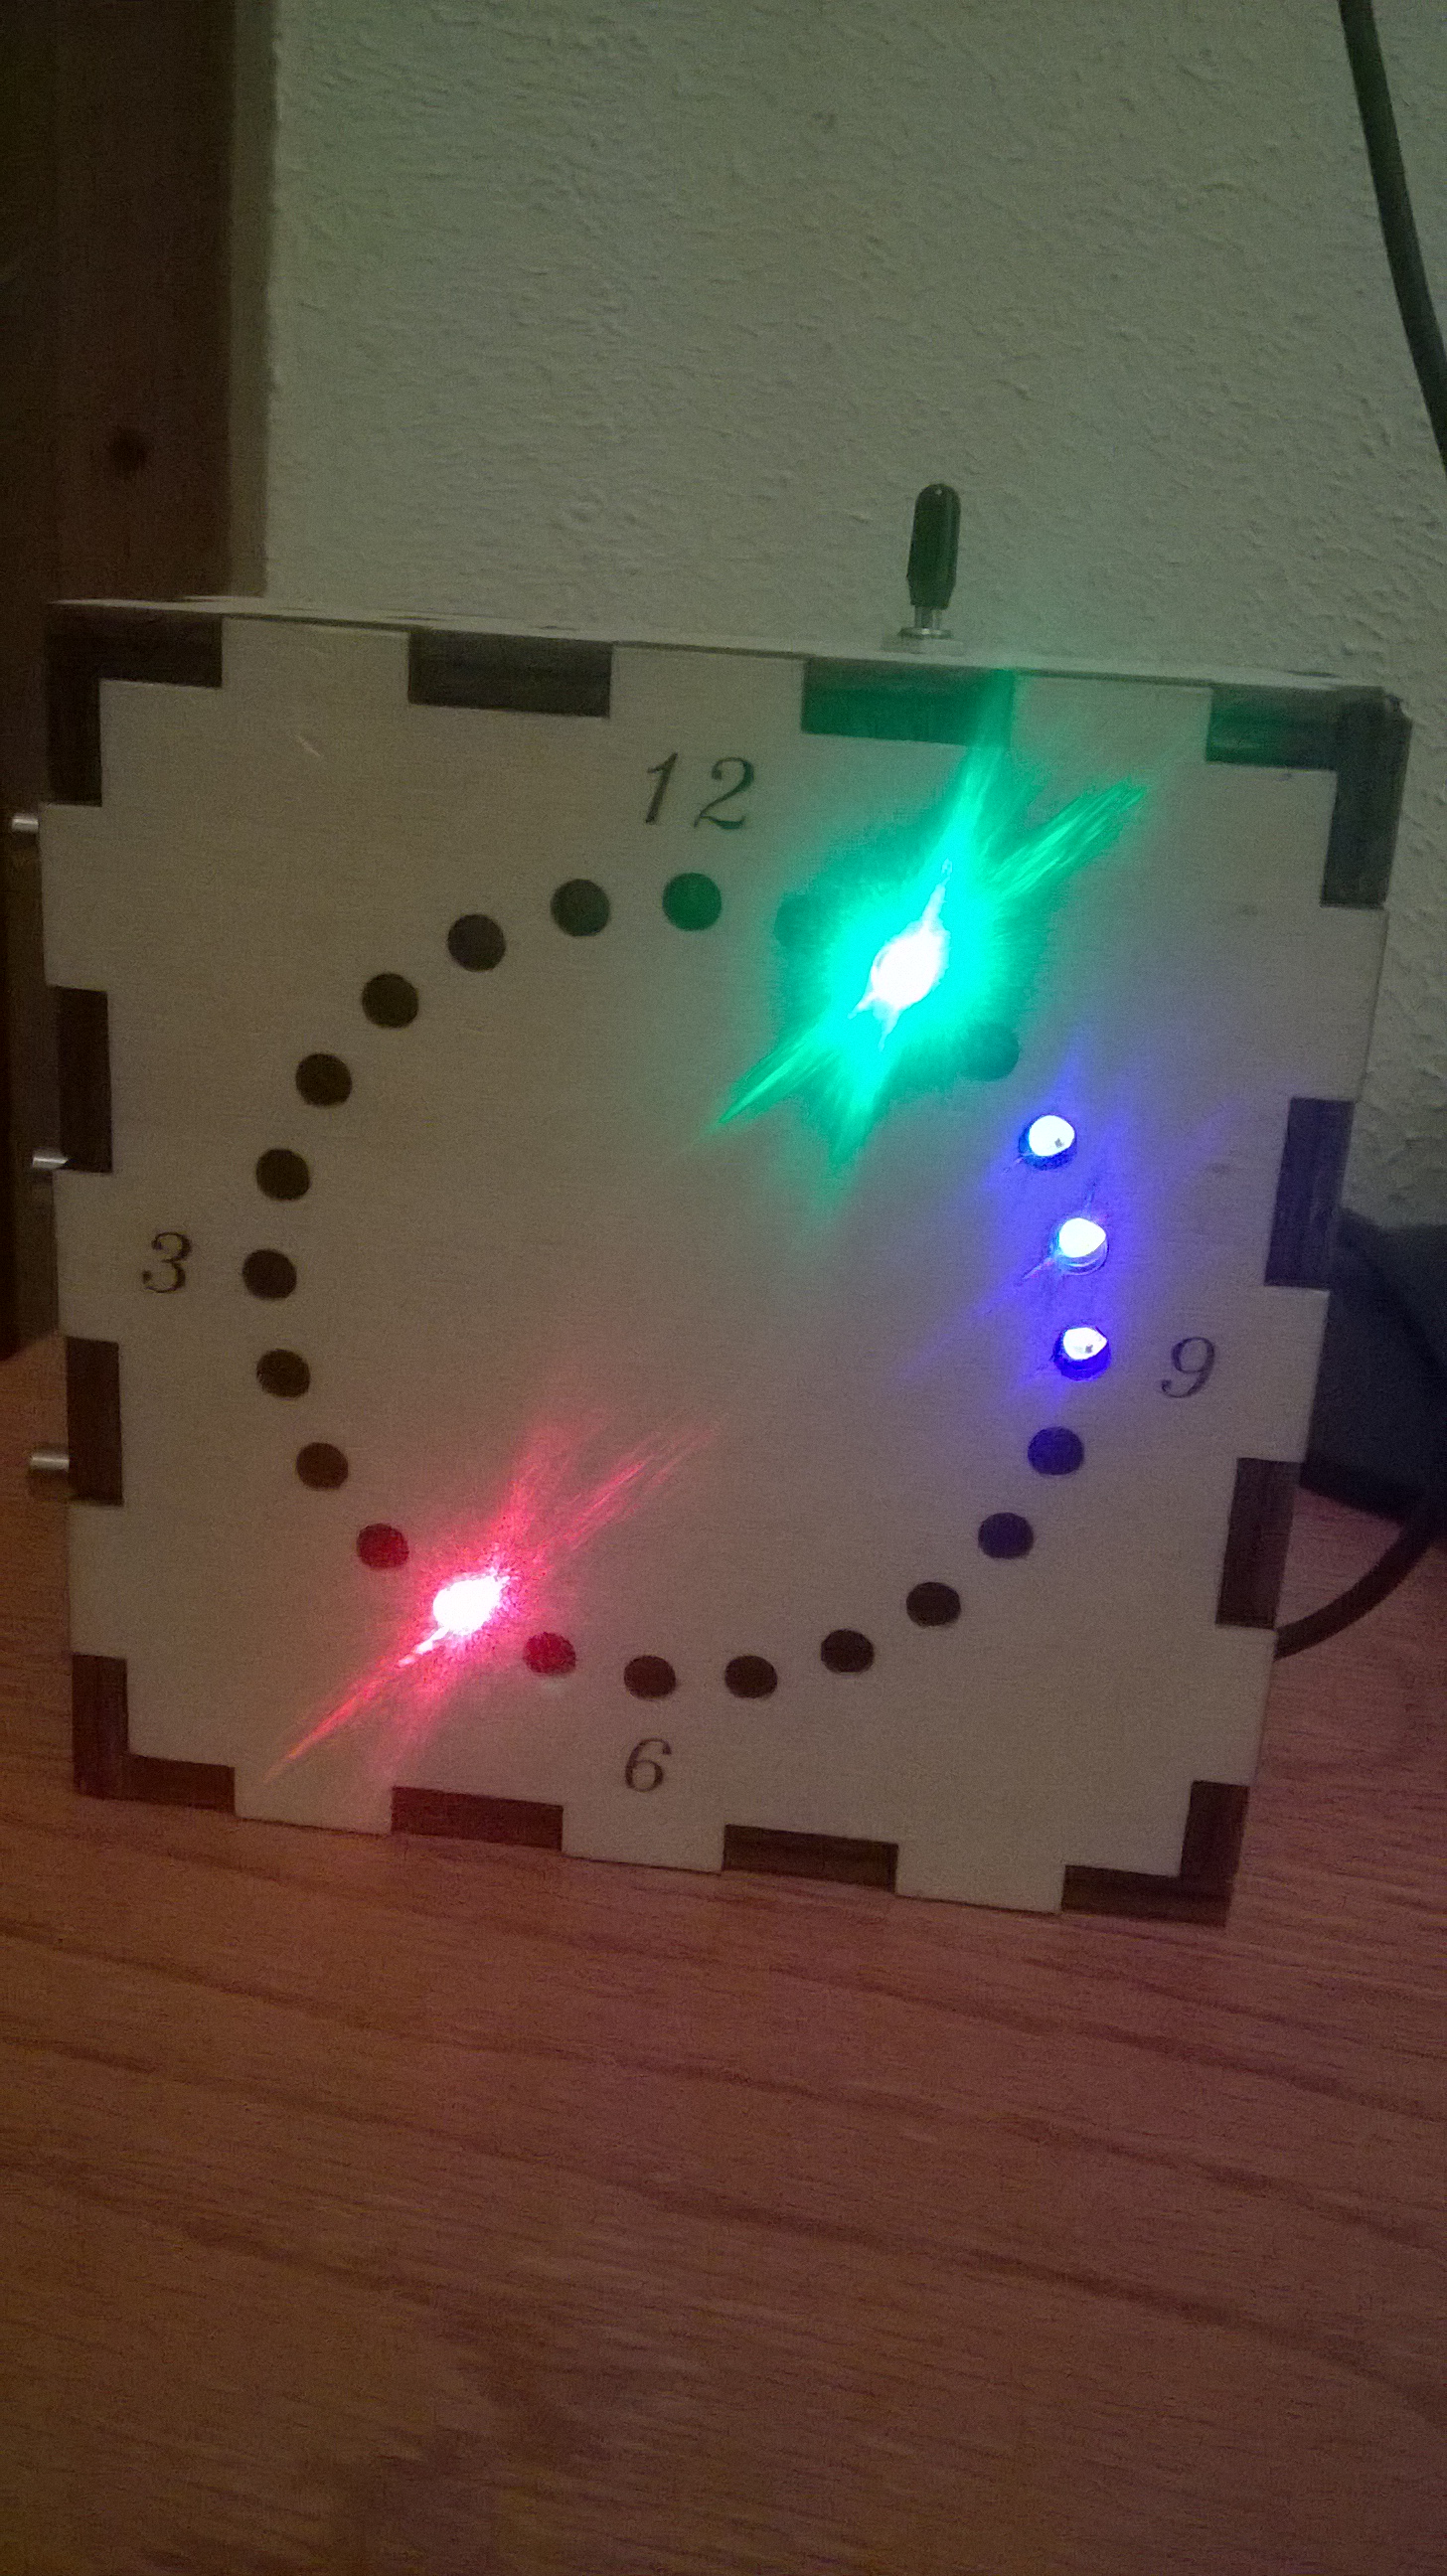
- Kiếm 1 cái hộp gỗ nào đó, khoan 24 lỗ và dán module vào mặt sau của hộp:

Phần mềm
- Các bạn vào đây và download thư viện
- Code thoai:
#include <Adafruit_NeoPixel.h>
#include <Time.h>
//Modified by MonsieurVechai


//////////////////////////////////////////////////////////////
////////            LED RING DEFINITION                 //////
//////////////////////////////////////////////////////////////
#define PIN A0
const uint16_t number_of_pixels = 24;
uint16_t hour_clock, minute_clock, second_clock;

// Parameter 1 = number of pixels in strip
// Parameter 2 = pin number
// Parameter 3 = pixel type flags, add together as needed:
//   NEO_RGB     Pixels are wired for RGB bitstream
//   NEO_GRB     Pixels are wired for GRB bitstream
//   NEO_KHZ400  400 KHz bitstream (e.g. FLORA pixels)
//   NEO_KHZ800  800 KHz bitstream (e.g. High Density LED strip)
Adafruit_NeoPixel strip = Adafruit_NeoPixel(number_of_pixels, PIN, NEO_GRB + NEO_KHZ800);

// Here we set the DEFAULT colors of the clock arms. In general, the larger the numbers, the brigher the clock is
uint32_t milli_color  = strip.Color ( 2,  10,  5);
uint32_t second_color = strip.Color (  0,  0, 10);
uint32_t minute_color = strip.Color ( 0, 10, 0);
uint32_t hour_color   = strip.Color (  10, 0,  0);
uint32_t off_color    = strip.Color (  0,  0,  0);

/* CLOCK POSITION OBJECT*/
class ClockPositions
{
 public:
  uint8_t milli;
  uint8_t second_clock;
  uint8_t minute_clock;
  uint8_t hour_clock;
  ClockPositions ();
  void update    ();
};


ClockPositions::ClockPositions()
{
  milli = second_clock = minute_clock = hour_clock = 0;
}

void ClockPositions::update()
{
  hour_clock   = map (hour() % 12, 0,  12, 0, number_of_pixels); //get hour from the <Time.h> library
  minute_clock = map (minute() % 60, 0,  60, 0, number_of_pixels); //get minute from the <Time.h> library
  second_clock = map ((second() % 60), 0, 60, 0, number_of_pixels); //conventional second clock
  milli  = map ((millis() %  1000), 0,  1000, 0, number_of_pixels);
}

/* CLOCK VIEW OBJECT*/

class ClockSegments
{
 public:
  ClockPositions    &positions;
  Adafruit_NeoPixel &strip;
  ClockSegments (Adafruit_NeoPixel&, ClockPositions&);
  void draw  ();
  void clear ();
  void add_color (uint8_t position, uint32_t color);
  uint32_t blend (uint32_t color1, uint32_t color2);
};


ClockSegments::ClockSegments (Adafruit_NeoPixel& n_strip, ClockPositions& n_positions): strip (n_strip), positions (n_positions)
{
}


void ClockSegments::draw()
{
  clear();
  add_color (positions.hour_clock     % number_of_pixels,  hour_color  );

  add_color (positions.minute_clock   % number_of_pixels,  minute_color);

  add_color (positions.second_clock     % number_of_pixels, second_color);

  add_color (positions.milli     % number_of_pixels,  milli_color);

  strip.show ();
}


void ClockSegments::add_color (uint8_t position, uint32_t color)
{
  uint32_t blended_color = blend (strip.getPixelColor (position), color);

  /* Gamma mapping */
  uint8_t r,b,g;

  r = (uint8_t)(blended_color >> 16),
  g = (uint8_t)(blended_color >>  8),
  b = (uint8_t)(blended_color >>  0);

  strip.setPixelColor (position, blended_color);
}


uint32_t ClockSegments::blend (uint32_t color1, uint32_t color2)
{
  uint8_t r1,g1,b1;
  uint8_t r2,g2,b2;
  uint8_t r3,g3,b3;

  r1 = (uint8_t)(color1 >> 16),
  g1 = (uint8_t)(color1 >>  8),
  b1 = (uint8_t)(color1 >>  0);

  r2 = (uint8_t)(color2 >> 16),
  g2 = (uint8_t)(color2 >>  8),
  b2 = (uint8_t)(color2 >>  0);

  return strip.Color (constrain (r1+r2, 0, 255), constrain (g1+g2, 0, 255), constrain (b1+b2, 0, 255));
}


void ClockSegments::clear ()
{
  for(uint8_t i=0; i<strip.numPixels (); i++) {
      strip.setPixelColor (i, off_color);
  }
}

/* APP */
ClockPositions positions;
ClockSegments  segments(strip, positions);
////////////////////////////////////////////////////
/////       END OF LED RING DEFINITION      ////////
////////////////////////////////////////////////////


void setup ()
{
  strip.begin ();
  strip.show(); // Initialize all pixels to 'off'
  setTime(20, 10, 0, 19, 7, 2016);
}


void loop ()
{
  positions.update ();
  segments.draw ();
}
Lưu ý:
- Các bạn có thể chỉnh màu các kim ở đoạn này ở code:
uint32_t milli_color  = strip.Color ( 2,  10,  5);

uint32_t second_color = strip.Color (  0,  0, 10);

uint32_t minute_color = strip.Color ( 0, 10, 0);

uint32_t hour_color   = strip.Color (  10, 0,  0);

uint32_t off_color    = strip.Color (  0,  0,  0);
- Các bạn có thể tham khảo ở đây về cách chỉnh màu RGB nha: http://arduino.vn/bai-viet/1006-fiat-lux-hay-co-anh-sang-phan-2-viet-code-blink-thanh-cho-neopixel-ws2812
- Bạn chỉnh giờ ban đầu ở đoạn sau nha:
setTime(20, 10, 0, 19, 7, 2016);
- Các bạn có thể chọn số lượng pixel tùy ý, không nhất thiết là phải mua vòng 24 pixels (tốt nhất nên là các bội số của 12 như 12, 24, 60, etc).
Gợi ý nâng cao
- Chỉnh màu các kim vào giờ khác nhau.
- Gắn thêm cảm biến ánh sáng để giảm độ sáng vào ban đêm và tăng độ sáng vào ban ngày.
- Gắn PIR để kích hoạt đồng hồ khi có chuyển động.
Bài tới tui sẽ hướng dẫn các bạn ứng dụng Neopixel Ring kết hợp với module âm thanh để làm đồng hồ analog đo âm thanh nha.

 )
)


